Step 1:
Installing apache
To install apache on ubuntu, Open Terminal. To open terminal click the Dash home from unity launcher. And type terminal in the search field.And click Terminal .

And type the below code in terminal and hit enter.
sudo apt-get install apache2
Type your ubuntu password and press enter.
![]()
Type y and hit enter to confirm apache installation.
After the successful installation , open your favorite browser and type
http://localhost/
in the address bar and press enter. If you will see ‘It works!’ in the Apache2 Ubuntu Default Page, then your apache works fine.

Step 2:
Installing PHP
To install PHP on your ubuntu OS, Open Terminal. And type the below code in terminal and hit enter.
sudo apt-get install libapache2-mod-php
Type your ubuntu password if needed.
![]()
Type y and hit enter to confirm PHP installation. This will install PHP7 on ubuntu.
After the successful installation restart Apache using the below code
sudo /etc/init.d/apache2 restart
or use the below code to restart
sudo systemctl restart apache2
Install php 7 and php 5.6 in the same system:
You can also install php 5.6 and php 7 in the same system. To install php 5.6 along with php 7, you need to add ondrej php PPA.
To add this PPA. open your ubuntu terminal. And add the below code in terminal and press enter key.
sudo add-apt-repository ppa:ondrej/php
then type the below command
sudo apt-get update
Then type the below command in terminal and hit enter.
sudo apt-get install php5.6
If you want to install some other php extensions use the below code to install them.
sudo apt-get install php5.6-mysql php-gettext php5.6-mbstring php-xdebug libapache2-mod-php5.6 php5.6-cgi php5.6-cli php5.6-curl php5.6-gd php5.6-intl php-imagick php5.6-imap php5.6-mcrypt php-memcache php5.6-pspell php5.6-recode php5.6-sqlite3 php5.6-tidy php5.6-xmlrpc php5.6-xsl php-xcache php5.6-fpm
You can switch the PHP version easily with the below code.
To switch from php7.0 to php5.6:
Type the below command in terminal and press enter key
sudo a2dismod php7.0 ; sudo a2enmod php5.6 ; sudo service apache2 restart
then
sudo ln -sfn /usr/bin/php5.6 /etc/alternatives/php
To switch from php5.6 to php7.0:
Type the below command in terminal
sudo a2dismod php5.6 ; sudo a2enmod php7.0 ; sudo service apache2 restart
sudo ln -sfn /usr/bin/php7.0 /etc/alternatives/php
Test PHP installation
To test PHP is installed, Type below code and hit enter (only for php7)
sudo gedit /var/www/html/phpinfo.php
in the terminal and type your ubuntu password if needed. It will open the phpinfo.php file in gedit.Type below code in the phpinfo.php file, save and exit it .
<?php phpinfo() ?>
Now open your favorite browser and type http://localhost/phpinfo.php in the address bar and press enter. If you will see the below page , then your php works fine.

To check the installed PHP version in terminal, type the below command in terminal and hit enter.
php -v

Step 3:
Installing MySql
To install MySql on ubuntu, Open Terminal. And type the below code in terminal and hit enter.
sudo apt-get install mysql-server
Type your ubuntu password if needed.
![]()
Type y and hit enter to confirm MySql installation.
During the installation you will be prompted for a password.Choose something secure and type the password and hit enter .

Repeat the password and press enter.

To install the mysql client, type the below command in terminal and press the enter key in your keyboard
To check the MySQL server status, use the below command
sudo systemctl status mysql
Install php mysql, php curl and php json modules:
To install php mysql, php curl and php json modules use the below command in terminal.
sudo apt-get install php7.0-mysql php7.0-curl php7.0-json
Step 4:
Installing phpMyadmin
phpMyAdmin is a free software tool written in PHP intended to handle the administration of MySQL over the World Wide Web.
Open Terminall. And type the below code in terminal and hit enter.
sudo apt-get install phpmyadmin
Type your ubuntu password if needed.
Type y and hit enter to confirm phpMyadmin installation.
During the installation you will be prompted for a configure database for phpmyadmin wjth dbconfig-common.
Select ‘Yes’ to configure database for phpmyadmin wjth dbconfig-common.

Then Enter password of the database’s administrative user.
and select OK and press enter.

Then enter your MySQL application password for phpmyadmin:
and select OK and press enter.

During the installation you will be prompted for a webserver configuration. Select apache2
(already selected) press enter.

After the successful installation and configuration, restart apache using the below command.
sudo systemctl restart apache2
Then open your browser and type
http://localhost/phpmyadmin/
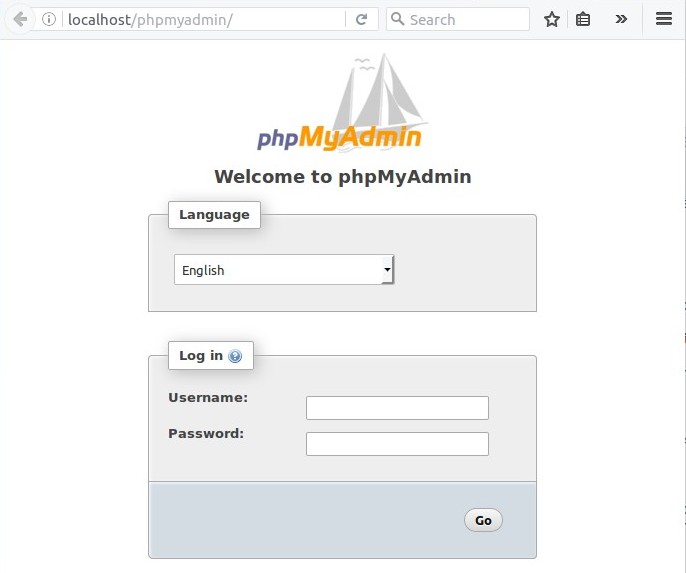
in the address bar and press enter. It will open the Phpmyadmin admin login page.
Type your username and password to login.
In case phpMyAdmin is not working or you get an empty phpmyadmin page, then please do the following steps.
Open terminal, and type the below command :
sudo gedit /etc/apache2/apache2.conf
it will open the apache2.conf file in gedit with root permission.
Add the below line at the end of the file and save and the exit it.
Include /etc/phpmyadmin/apache.conf
Restart apache service using the below command.
sudo systemctl restart apache2
Then type the below code in terminal.
sudo apt-get install php-mbstring php7.0-mbstring php-gettext
Then restart mysql using the below command.
sudo /etc/init.d/mysql restart
Then open your browser and type
http://localhost/phpmyadmin/
in the address bar and press enter. It will open the Phpmyadmin admin login page.
Type your username and password to login.
You’re now ready to start building your local website. just put all of your files into
/var/www/html/
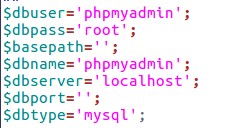
If you forget your username and password, just type the below command in terminal
sudo gedit /etc/phpmyadmin/config-db.php
Note down the username and password.


Comentários